
Records
Browsing records
Select a table from the sidebar, then click Data management to open the record list (DataView). The list shows the configured preview fields in a paginated table.
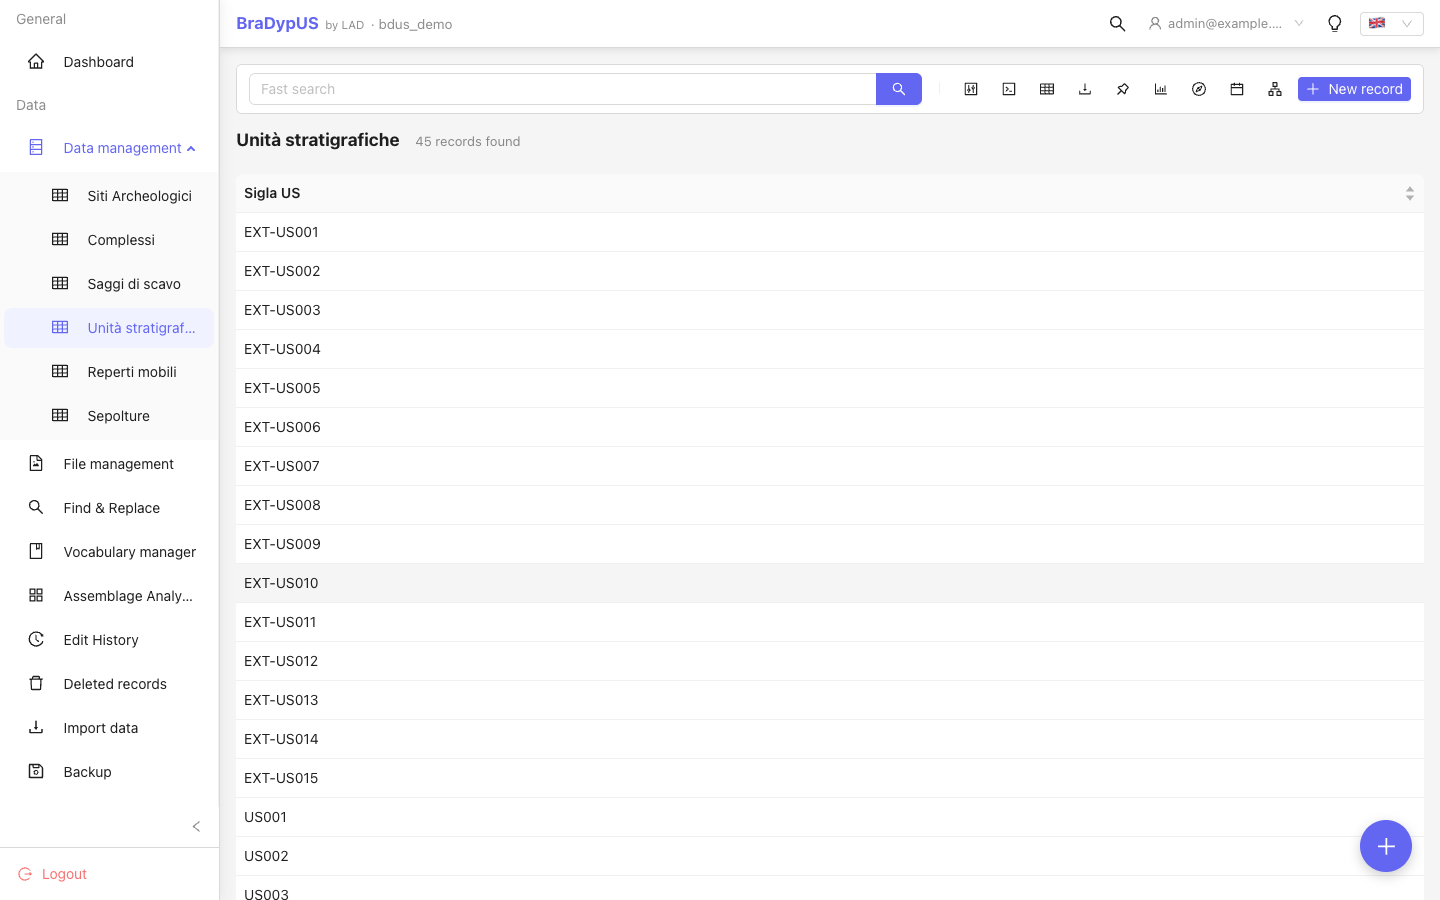
Controls in the DataView toolbar:
| Control | Action |
|---|---|
| Query bar | Type to search the preview fields; the list follows as you type |
| Filters | Open the Builder (nested AND / OR conditions) or the SQL tab — see Search & filter |
| Columns | Toggle which columns are visible |
| Export | Download the matching records as CSV, XLSX or JSON |
| Saved searches | Run, save or share a search |
| Chart, Map, Timeline, Harris Matrix | Open the matching view over the records of the current search (the last two only for tables that have the plugin) |
| New record | Create a new record |
On small screens everything but the query bar and Filters moves into a ⋯ menu, and New record is the round + button.
Click any row to open that record in RecordView.
Reading a record
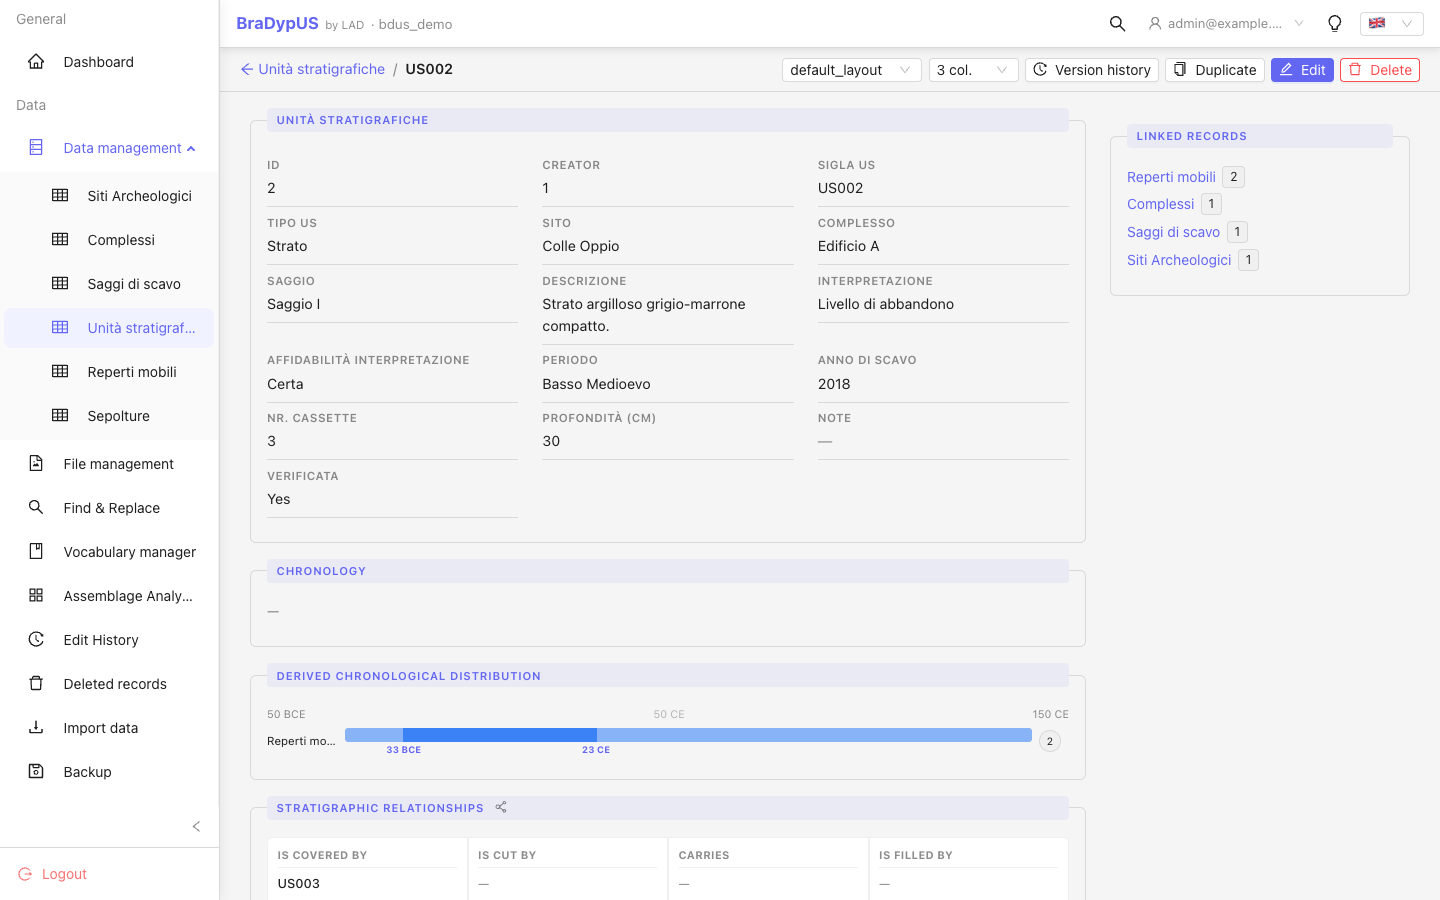
RecordView displays all field values for a single record, organised into sections:
- Core fields — the table's own columns
- File gallery — attached images and documents
- Plugin tables — inline editable sub-tables
- Related records — cross-table links defined in Config → Relations
- Stratigraphic relations — RS panel (if configured)
- Bibliography — Zotero citations (if configured)
Previous / Next
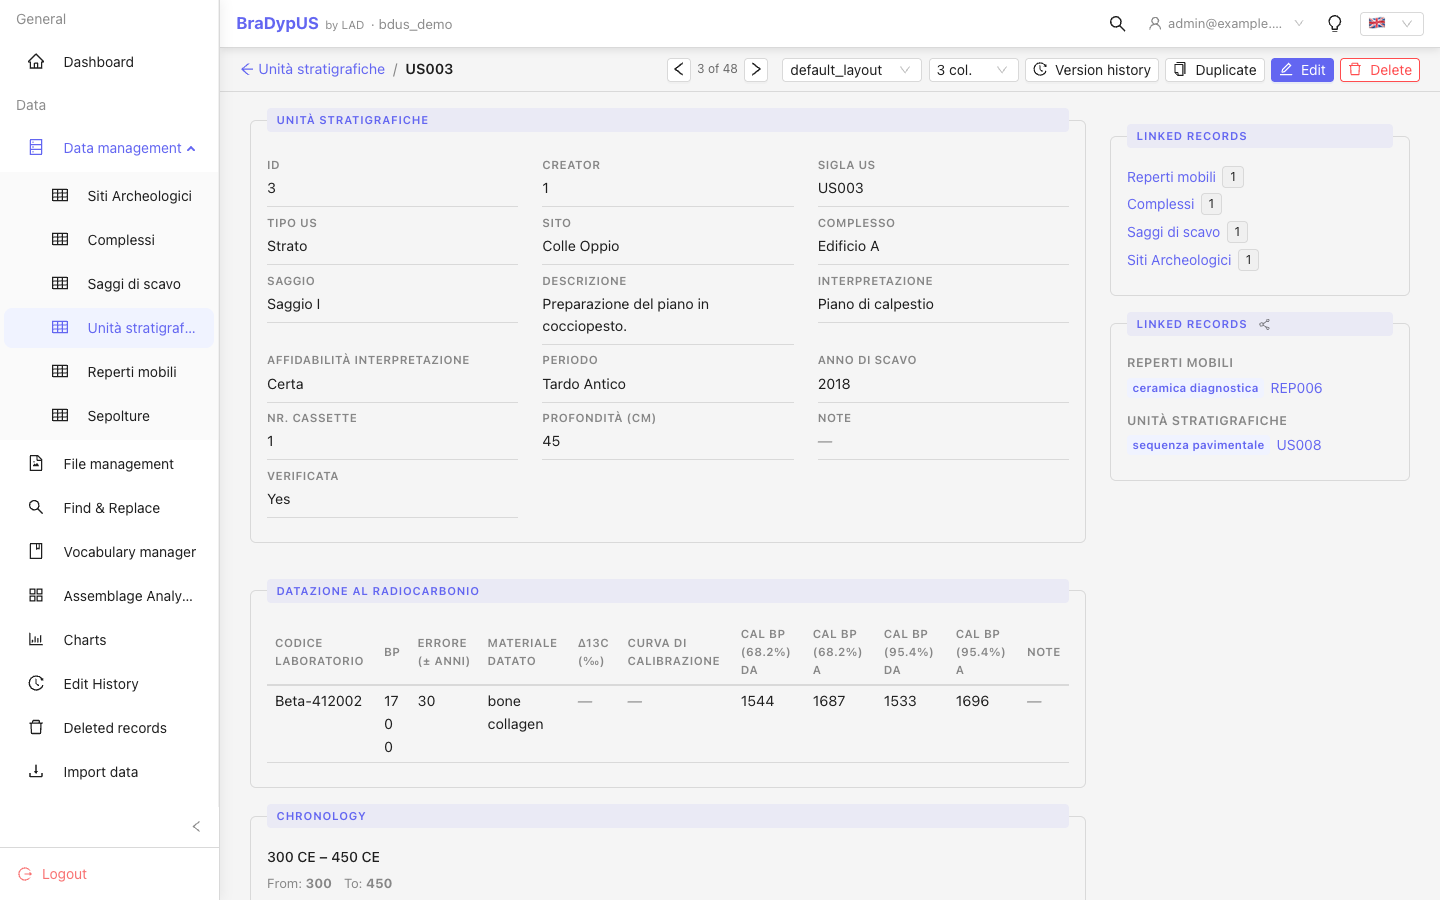
When you open a record by clicking a row in the record list, the header shows a small navigation bar — ‹ 61 / 103 › — that lets you step through the records of that list without going back to it each time.
- The order is exactly the one the list was showing: its sort and its search (text, Builder, SQL or a link's filter). The bar reaches every matching record, not only the ones on the page you clicked from.
- The ← and → keys do the same, as long as no field has the focus.
- The bar is hidden while you are editing a record: save or cancel first.
- It appears only when you arrive from the list. A record opened from a link (a related record, a map popup, the Harris Matrix) or from a bookmark has no list to walk through, so no bar is shown.
- It survives a page refresh, but it is remembered per browser tab: close the tab and it is gone.
- The browser's Back button and the back to list link at the top still return to the list, whatever number of records you stepped through.
- Lists with more than 5000 matching records are walked only up to the 5000th, and the counter shows it (‹ 12 / 5000+ ›).
The position is computed when you open the first record: if other users add or delete records meanwhile, the order you are walking does not change until you return to the list and open a record again.
Creating a record
Click New in the DataView toolbar (or the floating + button). An empty edit form opens with all fields blank (or pre-filled with defaults).
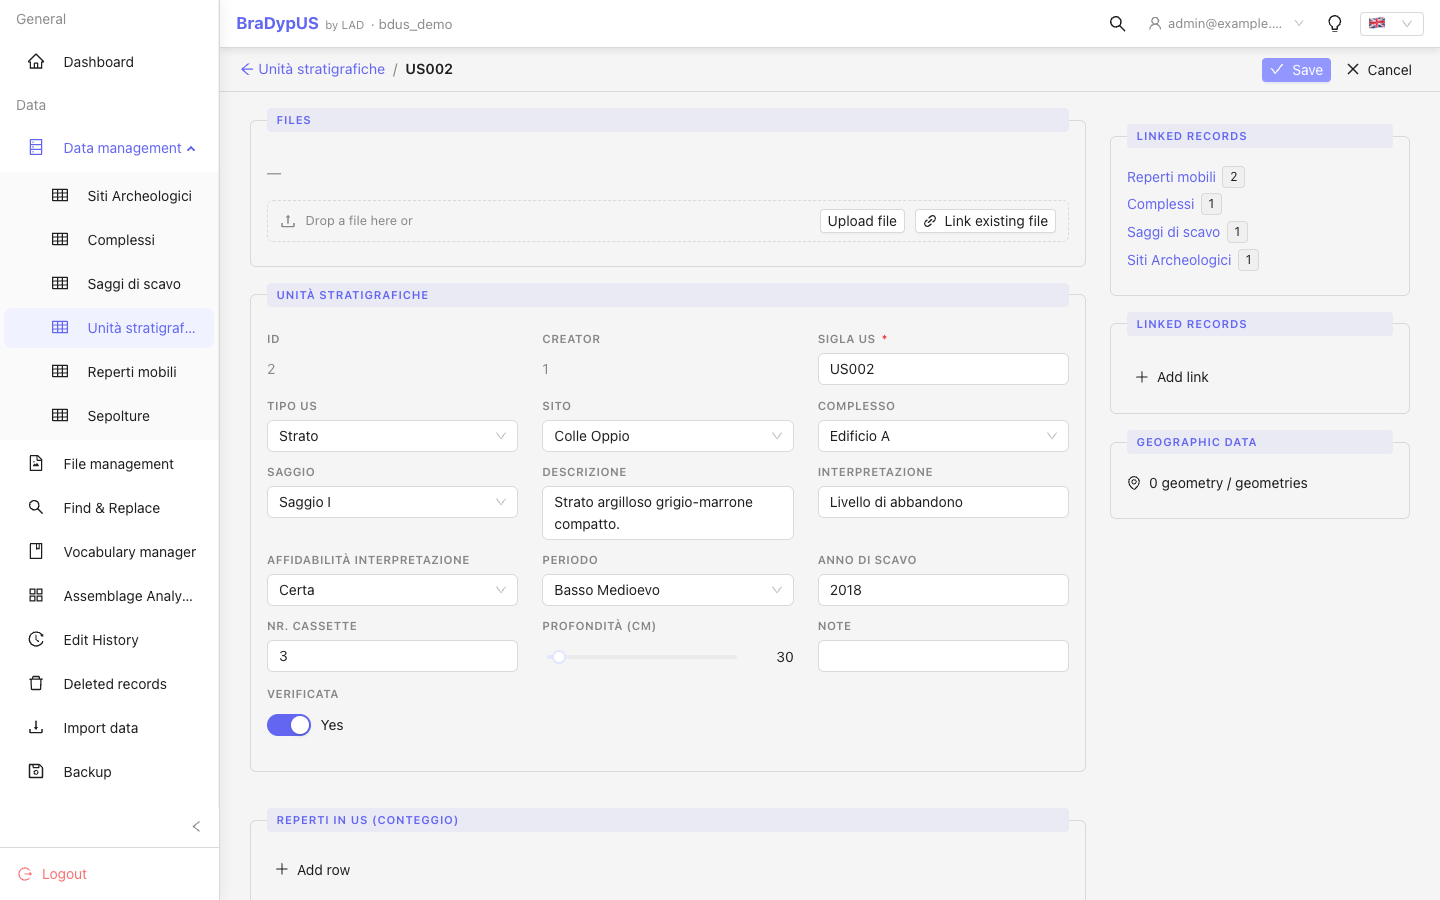
Fill in the fields and click Save. Required fields are marked and the form will not save until all required values are provided.
Editing a record
Open a record in RecordView and click Edit in the header. The same form used for creation opens with current values pre-filled.
- Changes are not saved until you click Save.
- Navigating away with unsaved changes triggers a confirmation dialog.
- Validation errors are shown inline next to each offending field.
Deleting a record
In RecordView, click the Delete button in the record header. A confirmation dialog prevents accidental deletion.
Deleted records are soft-deleted and can be recovered from Deleted records for a configurable retention period.
File attachments
Viewing files
In RecordView (read mode), the file gallery panel shows all files attached to the record. Clicking any thumbnail or filename opens an in-app preview without leaving the page:
- Images — displayed in a fullscreen lightbox overlay.
- Documents (PDF, etc.) — displayed in an inline viewer panel.
Managing files (edit mode)
In RecordView (edit mode), the file gallery panel allows:
| Action | How |
|---|---|
| Upload | Click Upload file or drag & drop a file anywhere on the drop zone |
| Link existing | Click Link existing file to pick a file already in the library — no re-upload needed |
| Reorder | Drag the grip handle to change the display order |
| Unlink | Click the chain icon (🔗) to remove the file from this record only — the file is kept in the library |
| Delete | Click the trash icon to permanently delete the file from the whole application |
Images are automatically downscaled on upload if Max image size is set in App settings, and optionally converted to a standard web format (WebP/JPG) if format conversion is enabled there too.
File management view
The File management page (sidebar → File management) lists all files uploaded to the application, regardless of which record they are attached to. For each file you can:
- Browse thumbnails and previews (click to open inline)
- Edit the description and keywords in-place (auto-saved on blur / Enter)
- See which records the file is linked to
- Filter for orphan files — files not linked to any record
- Replace the file binary while keeping metadata
- Delete the file permanently
Duplicating a record
In RecordView (read mode), click Duplicate in the record header. A new record is immediately created with all the same field values. You are then taken directly to the new record so you can review and adjust it before saving.
The creator field of the duplicate is automatically set to the logged-in user. Privilege required: add new.
Manual links
Manual links connect any two records across any two tables without requiring a formal FK relation to be defined in Config. They appear in their own section in RecordView, grouped by target table.
Adding a manual link
In RecordView (edit mode), open the Linked records section:
- Click Add link.
- Select the target table.
- Type to search for the target record.
- Optionally type a relation label — a short free-text description of what the link means (e.g.
cites,is part of,parallels). The label is shown as a small chip next to the link in both records. - Select the record from the autocomplete list; the link is saved immediately.
Typed links
The relation label turns a generic link into a typed link. You can use any label you like — there is no controlled vocabulary enforced by the system. Typed links are the foundation for the planned graph visualisation feature (C2), which will render the network of typed links as an interactive diagram.
Graph view
When at least one link exists, a small icon button appears in the Linked records section header. Click it to switch between the default list view and an interactive graph view:
- The current record is shown as an orange node in the centre.
- Linked records appear as blue nodes labelled with their identifier value.
- Edges carry the relation label if one was assigned.
- Click any node to navigate directly to that record.
- Use the mouse wheel to zoom; drag to pan.
The graph uses a force-directed layout and is read-only — add or delete links from the list view.
Deleting a manual link
In edit mode, click the × button next to the link. Links are bidirectional — deleting it removes it from both records.
INFO
Manual links are stored in the bdus_userlinks system table. They are not affected by deleting the linked record — orphaned link entries are cleaned up when the surviving record is next opened.